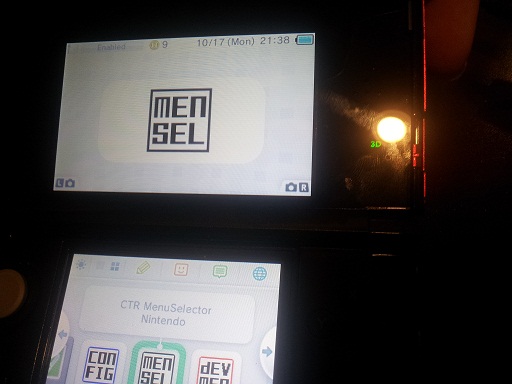
3DS Development Unit Software
The following is a description of the functions where possible of the applications unique to 3DS Development Units. Descriptions Derived from SDK revision 37901
Dev Menu
This application on the top screen displays the current firmware and revision, the free space available on the TWL DSiWare NAND partition and on the SD card if present. It also provides information on the current file or device selected, as well as navigation instructions for the bottom screen.The bottom screen has three different windows, which are:
- Programs- From this window, applications can be loaded from the nand, the SD card and the slot 1 card. This is shown in the format of "'unique id' '(name of application if stored on nand/sd card or device type if loaded from slot 1)'. Applications not on a slot 1 card can be deleted from this menu
- Import- From this window, applications (compiled to be installed) in the format of a .CIA file(see File Formats) can be installed from an SD card to the CTR NAND, TWL NAND and the SD card.
- ExtData- From this window, the 3DS's ExtData can be deleted
(Note that retail 3ds games are not recognized by Dev 3DSs and prints "Unknown Card" in the 'Programs' window and shows no details on top screen)
Config
This application is a configuration menu for the 3DS, which has the following options:
- Reset Settings - Resets all settings to default.
- Hid Setting - (human interface device) Calibrates Touch-Pad and Analog stick.
- Rtc Setting - (real time clock) Sets system time.
- Lcd Setting - Sets display settings as found in the home menu as well as Flicker settings.
- User Info Setting - Allows username change and "NG NAME FLAG" to be set to true or false.
- Other Setting(branches off into other settings) -
-Sound Mode- mono/stereo/surround
-System Mode- Locked to "Prod" for unknown reason (it seems to be refering to memory allowance for 'prod' which is 64mb).
-Exception handler- enable/disable
-Break Stop (?)- enable/disable
-Menu- (Home Menu/Test Menu) test menu similar to the menu shown in the "3ds stolen from factory video" see below
-Language- same as in system settings but also has an "invalid" option
-Dlp Force Child Import- enable/disable (I am not sure what this does)
-Debug Mode- enable/disable (I am not sure what this does)
- Test Setting - Test calibration of touch pad and joystick
- Eula Setting - Allows user to change "Agree Version" namely:"ff.ff" the two symbol sets are interchangeable with combination variations from aa to 99 (default is 00.00 where the Eula is not accepted yet).
- Stereo Camera Cal for Check - Camera test (?) as options to "write strange data(excess Z-rot) and "reset to factory default".
- Gyro / Accel Cal for Check - Allows Gyro and Accelerometer to be calibrated.
- Ctr Info Setting - Changes settings to that found on the ctrsetting.txt on an SD .
The Test Menu
The Test Menu is a menu alternative to the Home Menu (the default menu that starts up on regular 3DSs). It can be enabled by changing the 'Menu' option under "Other Setting" in the Config Menu to 'Test Menu'. The test menu seems to vary upon firmware revisions. But for firmware 0.15.8 (r37901), looks like this:
The Test menu, in its limited functionality when compared to the Home menu can only launch Dev menu and slot 1 devices, and much like the home menu you can pause applications and go back to the test menu by pressing the home button. Note this is not possible where a game has intentionally disabled the functionality of the home button, like in trade show sample. A video of someone using a dev unit with such a game can be seen here at http://www.youtube.com/watch?v=B1iYD70oUxE.
- If the application can be paused, the user can then take a screen shots which is saved to the SD card in the Capture folder (the test menu will create the folder if it does not already exist) in the format "yyyymmdd_hhmm_st_xxxxx.bmp". Where yyyy is the year, mm is the month, dd is the day, hh is the hour in 24hr time and mm is the minute of when the screen shot occured. "st" is the screen type, there will be one for each screen 'LO' lower screen and 'UL' for upper screen. And xxxxx is the number starting at 00000 and goes up by 1, which tells the user which screen shot it is. For example, a screen shot taken of the top screen at 9:25 am on the 31/10/12 would look like this "20121031_0925_UL_00000.BMP".
