3DS Development Unit GUI: Difference between revisions
Cooolgamer (talk | contribs) |
Cooolgamer (talk | contribs) Tag: Undo |
||
| (One intermediate revision by one other user not shown) | |||
(No difference)
| |||
Latest revision as of 11:50, 26 February 2023

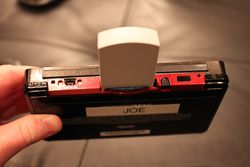
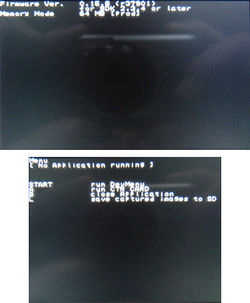
A Developer (or Test) 3DS has two GUIs which can be used as a primary interface. Description of homemenu interface was taken from observations of a PAL 3DS Development Unit with Firmware 0.15.8 (revision 37901). Description of testmenu was taken from testmenu v0.24.3 (revision 60260) cia.
Home Menu
The simple fact of the matter is that every aspect of the retail mimicking software on a developer 3DS, is that they can be updated at the will of the developer. It will run any revision of any system software provided it is compatible with the 3DS' revision and signed properly. The Home Menu revisions for developer 3DS' are usually identical in format to the retail 3DS Home Menu, however, the developer Home Menu differs from its retail counter-part in the following ways:
- There is no set list of application on the home menu, with the exception of the reserved slot for game cartridges
- All applications like Nintendo 3DS Sound, and System Settings have to be installed manually
- There are dedicated system updaters for both o3ds and n3ds dev units
- All system applications can* be deleted. *Only older revisions of the Dev Menu were capable of managing system applications, allowing for their deletion. Later revisions have this functionality removed. Note while in later revisions of the Dev Menu System applications cannot be seen, they can be imported.
Debug functions
- Pressing X+Y toggles HOME Menu's region, language, creation date/time, revision information, and percentage bars used to measure application banners processing. The first bar indicates how much can be processed in a single frame; the second bar indicates CPU processing; the third bar indicates GPU.
If those buttons are held during start-up, the icon database & cache are deleted.
- Pressing X+B when the bars are visible, lets the user cycles between regions displayed for the banner and the title name.
Test Menu
The Test Menu is a menu alternative to the Home Menu and has minimal functionality. It can be enabled by changing the 'Menu' option under "Other Setting" in the Config Menu to 'Test Menu', or by using the CTR Menu Selector (this is also a Developer App). Apart from its appearance, it has a number of restrictions that do not apply to the actual HOME Menu. Application region-checking is not performed by the Test Menu.


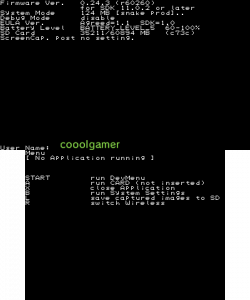
In the latest Test Menu, those informations are displayed on the upper screen:
- Firmware version, CTR-SDK version
- System Mode (see here)
- Debug Mode enabled/disabled
- SD Card information
- EULA version
- User name
- Remaining battery life
- Screen capture statut (Maybe for ctr debuggers?)
And on the lower screen:
- Test Menu status
- Explanation of Test Menu functions
The Test menu, can only launch Dev menu (,system settings on newer versions) and slot 1 device. When the HOME Button is pressed while an application is running, that application is suspended and this menu is displayed; however, to return to the Test Menu, the application must handle a press of the HOME Button. Note this is not possible where the developer has intentionally disabled the functionality of the home button, like in trade show sample.
When an application is suspended, pressing the L button takes a screenshot of the upper and lower screens, storing it into the Capture folder of the SD Card. This function won't work if no SD Card is inserted. Files are generated in the following manner: [YYYYMMDD_HHMM date format]_[Screen]_[Index].bmp. [Screen]: UL = upper screen, left eye image; UR = upper screen, right eye image; LO = lower screen [Index]: the number starting at 00000 and going up by 1 for every screenshot taken within the same minute.
For example, a screen shot taken from the top screen for the left eye at 9:25 am on the 31/10/12 would look like this "20121031_0925_UL_00000.BMP".